Counter-Strike 2: build a round plan that survives first contact
Learn CS2 with a practical guide to stopping and shooting, team buys, trade spacing, grenades, bomb-site decisions, and a focused practice routine.
Take these into your next session
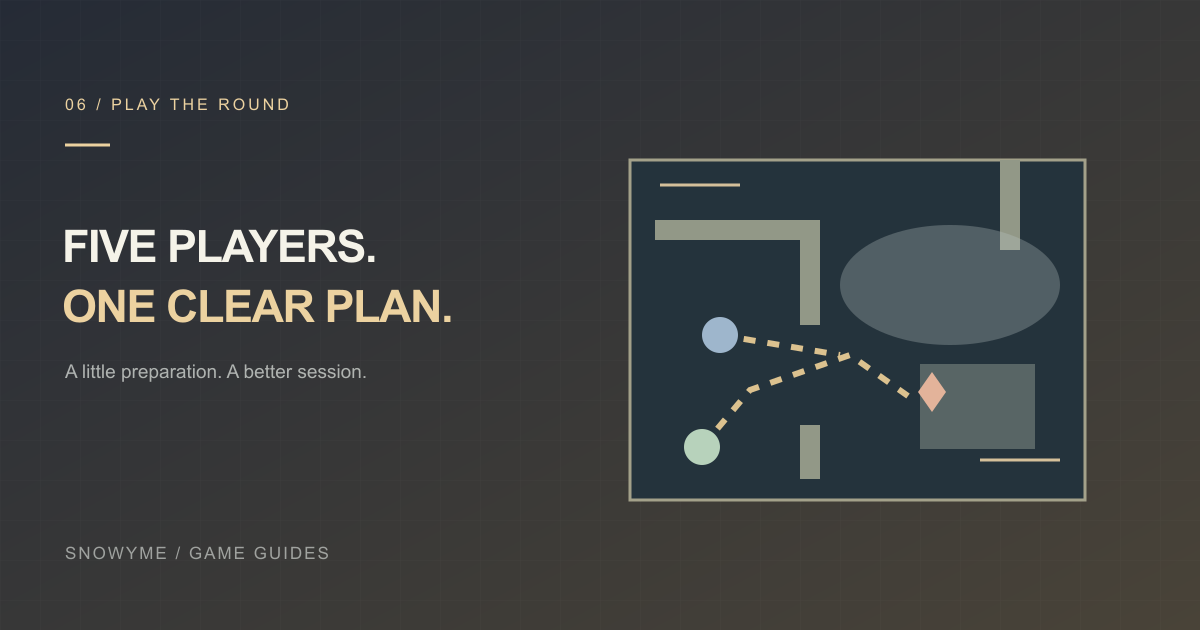
- Stop before firing and clear the next angle with a prepared crosshair.
- Buy and move with the team so one lost duel can be traded.
- Use utility to cross a specific danger, then defend the objective together.
What this guide covers Standard PC bomb-defusal matches in Counter-Strike 2. Casual, community servers, and special modes can use different rules. Map pools, prices, and grenade behavior may change; examples explain decisions rather than current professional lineups.
A good Counter-Strike round starts before anyone sees an opponent. Your buy determines which fights you can afford. Your route determines how many angles you must clear. Your spacing determines whether a teammate can recover the situation when the first player falls. Aim matters throughout, but it works best when those choices give it a fair chance.
This guide is for players moving from casual shooting into standard bomb-defusal matches. It focuses on useful habits that work across maps. You will build a simple attack, understand when to stop fighting, and learn how to review a loss without reducing every round to “I should have hit that shot.”
1. Learn one map and a small weapon set first
Begin with one map you enjoy and can play regularly. Learn the two sites, the main routes between them, common defensive positions, and the names your teammates use. Walk through it in practice without an opponent. At each doorway, identify the close corner, the longer angle, and a place to retreat.
Keep your early weapon practice focused: one practical rifle for each side, a pistol you regularly buy, and one lower-cost option for constrained rounds. The AK-47 and your preferred M4 variant are useful foundations. Learn what each weapon feels like at short and medium ranges before spending most of your time on specialized purchases.
Choose a visible crosshair and a sensitivity that allows controlled corrections. There is no universal professional setting that fits every player. Leave settings stable for several sessions, then change one thing if a repeated problem appears. Constant adjustment makes it hard to distinguish unfamiliar controls from poor positioning.
Use comfortable, audible game sound. Learn which movements reveal information, but do not walk everywhere by default. Quiet movement is valuable when concealment matters; running is necessary when the team must trade quickly or reach a position before the opponent. A silent arrival after your teammate has already died is not coordination.
2. Stop, aim, and choose the right firing pattern
Most rifle shots become much less accurate while moving. Practice a short strafe, a deliberate stop, and a single shot at a fixed point. Counter-strafing—briefly pressing the opposite movement direction—helps stop sideways movement quickly when timed correctly. Learn the result you want before trying to perform it at maximum speed.
Watch where the first bullet lands. If it repeatedly misses a stationary target despite a centered crosshair, you may be firing before movement settles. If the first shot is accurate but the next several climb away, the problem is recoil control or burst length. These are different drills, so do not respond to both by changing sensitivity.
At longer ranges, short bursts with enough time for accuracy to recover are often easier to control than a full spray. At close range, a committed spray can be appropriate. Practice pulling against your weapon’s recoil while recognizing that spreading bullets across an entire magazine is not the same as a precise laser pattern.
Place your crosshair at likely head height before an enemy appears. As you round a corner, move it with the next threatened position. If you aim at the floor and rely on a large flick after contact, you make every duel harder than necessary. Geometry and elevation can change head height, so learn the actual map rather than using one horizontal line everywhere.
3. Build a buy around this round and the next
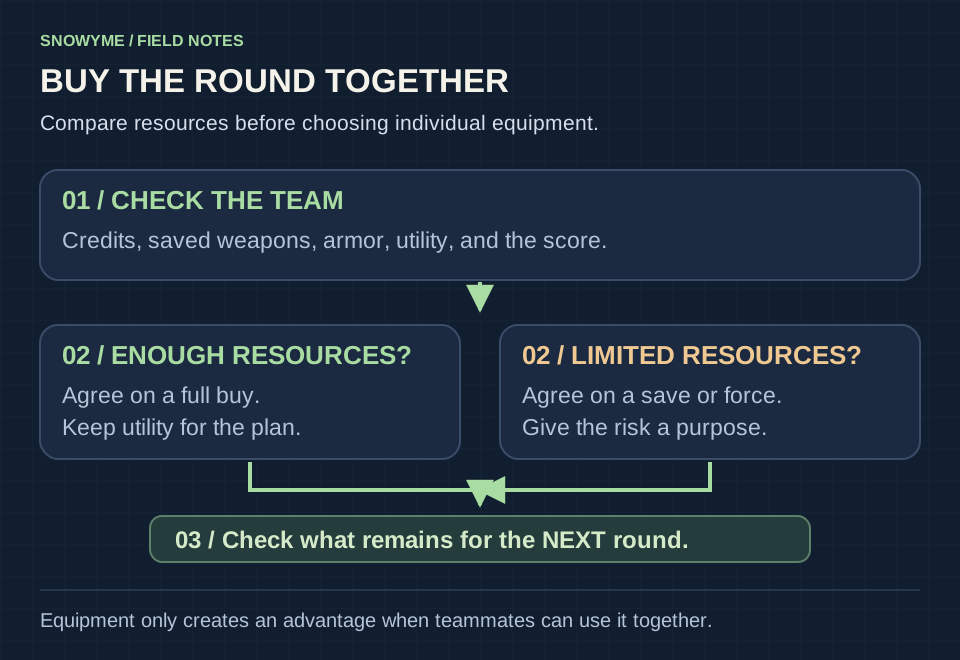
Use freeze time to check the team’s equipment and likely plan. A rifle alone does not create a full buy: armor, useful grenades, and a defuse kit where appropriate all affect what the team can do. You can also drop a weapon for a teammate so their remaining money can support other needs.
| Team position | A practical choice | What makes it go wrong |
|---|---|---|
| Most players can afford useful equipment | Agree on a coordinated buy and a simple route | Each player chooses a different pace and the equipment never works together. |
| Several players are short of money | Save or make a deliberate lower-cost plan together | One player buys an expensive rifle while the rest cannot trade effectively. |
| You have a saved rifle after a loss | Discuss whether to protect it, support a force, or drop | Assuming the saved weapon automatically means everyone should spend. |
| It is the last round before an economy reset | Spend available resources that can help now | Saving money that will not benefit the following half. |
An eco is a decision to protect future buying power. A force buy intentionally risks limited money to contest now. Neither is automatically right after every loss. Consider the score, saved equipment, loss-bonus state, and the team’s willingness to execute the same idea. Check the current buy menu rather than relying on prices from an old guide.
Armor choices also depend on likely opponents. A helmet has obvious value against weapons whose headshots it can help you survive, while other threats can still kill through it. Avoid turning that observation into “never buy a helmet” or “always buy everything.” You are purchasing answers to the round you expect, with imperfect information.
4. Enter close enough to trade, without forming a queue
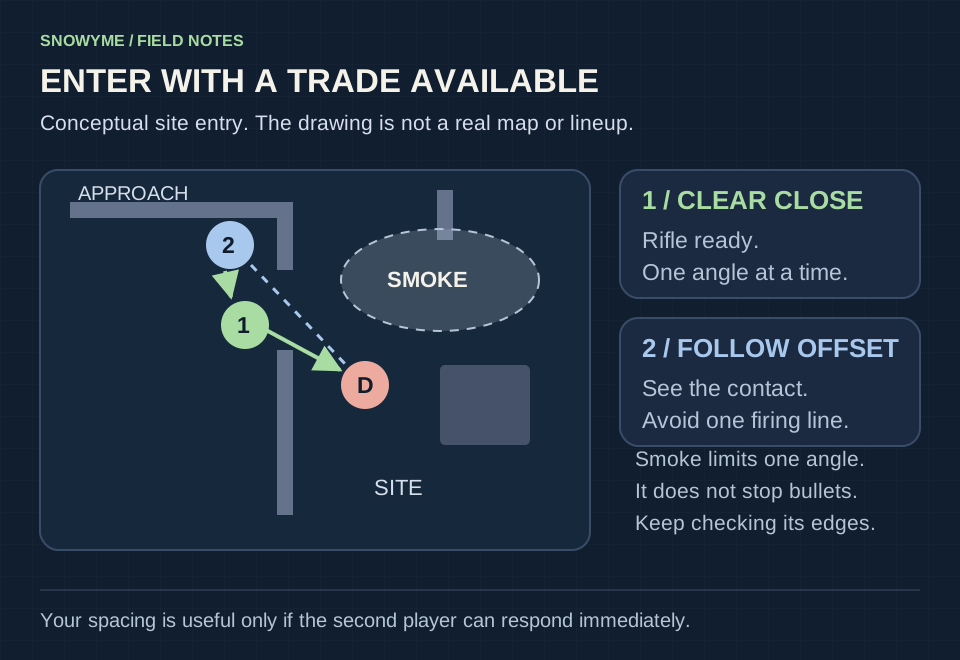
A trade happens when a teammate quickly punishes the opponent who eliminated the first player. To make that possible, you need useful distance, a visible route, and readiness. Being somewhere behind the entry player is not enough if you must first reload, climb an obstacle, or cross another unobserved angle.
Avoid lining up directly behind a teammate in the same bullet path. Instead, prepare a complementary position from which you can see their likely opponent after they move. Too close creates collision, shared exposure, and easy multi-kills; too far gives the defender time to reposition. The correct gap depends on the choke and the weapons involved.
Assign simple responsibilities before crossing: “I clear close; you watch the back box.” If both players stare at the same corner, the second threat remains free. If the entry player sees something unexpected, communicate the change quickly rather than continuing the memorized route blindly.
Suppose two attackers must enter a small site through one doorway. A smoke blocks a distant defender, a flash arrives after a short call, the first attacker checks the close corner, and the second follows with their rifle ready. The plan has removed one angle and made the remaining duel tradeable. Throwing three grenades from the doorway while the first player fights alone does neither.
5. Give every grenade an immediate purpose
Start with one useful smoke and one flash on each side of your chosen map. Practice them in the current game version. Check where they land, when they bloom or detonate, and whether a teammate can use the opening. A technically accurate throw is wasted if everyone arrives after it expires.
Smoke can cut a dangerous sightline and allow a crossing, but it also hides movement. Respect its edges and the routes it makes uncertain. CS2 smoke is interactive: gunfire and high-explosive grenades can affect visibility through it. Do not treat the cloud as a solid wall or assume an old one-way setup still behaves identically.
A flash should reduce the opponent’s ability to contest when your teammate peeks. Call the timing and avoid blinding your own entry. A pop flash is useful because it leaves little reaction time, but learning a reliable, understandable throw is more valuable than carrying several fragile tricks into a match.
Fire grenades can deny space or force someone from a common position; HE grenades can punish known concentrations or complement damage. Ask what follows each throw. If nobody can see the displaced defender, they may simply move to another good position. Keep a grenade for a later phase when that has more value than spending everything at spawn.
6. Attack with information, commitment, and a bomb plan
Early in a round, collect useful information without donating free duels. Listen for utility, check a relevant lane, and notice where defenders contest. A quiet lane is not proof of an empty site, and one flash does not prove several defenders are stacked there. Call what you know and distinguish it from your guess.
Once a route becomes favorable, move together enough to use it. A slow default can gather information and stretch defenders, but a team of beginners spread across the map without a timing is often just taking separate fights. Agree on what event will trigger the next move: a pick, a smoke, a call, or a regroup.
Keep the bomb in a recoverable position. Sending the carrier first into an isolated duel can strand the objective where the rest of the team cannot reach it. Conversely, taking a site while leaving the bomb far behind creates a different failure. Assign someone to carry it with the main plan and communicate a drop.
After entering, clear the necessary positions before planting. Choose a plant the surviving teammates can defend, but do not die pursuing an exposed perfect plant when a safer one is available. Tell everyone where it is. A post-plant position is useful because it protects the bomb or supports a teammate, not simply because it is far away.
7. Defend with survival and truthful information
On defense, learn a starting position that gives you an early task and a retreat. You might spot an approach, delay with utility, or support a teammate’s contact. If your position has no way to survive a coordinated push, understand that you are committing to a risky fight before the round begins.
Do not rotate the whole team on one sound. Report the evidence: two players seen, several footsteps, bomb spotted, or utility used. A bomb sighting matters, but opponents can still change direction. Maintain enough coverage that one early hint does not surrender the other site for free.
When a push overwhelms you, falling back can preserve a stronger retake. An isolated last stand that gets one elimination may be worse than surviving with a smoke, a kit, and a teammate arriving. Sometimes you must hold because retreat is impossible; that is a position-specific decision, not a universal command to hide.
During a retake, check the clock, remaining enemies, utility, and equipment. In standard settings a full defuse takes ten seconds without a kit and five with one; unlike VALORANT, there is no saved halfway defuse checkpoint. A tap gathers information or pressures attackers, but you still need enough uninterrupted time to finish. Saving equipment can be reasonable when the remaining attempt is implausible.
8. Win advantages without chasing the last duel
In a favorable numbers situation, make opponents solve multiple coordinated threats. Do not offer a sequence of isolated duels that lets one player equalize the round. You can preserve pressure with crossfires, information, and control of important routes instead of endlessly peeking.
After a kill, reload only if you need to and have safety. Immediately replacing a mostly full magazine while another opponent is ready to trade gives away the advantage. Reposition when your location is known, but check whether moving exposes you to a different angle or abandons a teammate.
When outnumbered, seek a way to isolate one relevant duel rather than facing everyone simultaneously. That may mean changing elevation, using a smoke, or moving quietly to an unexpected approach. It does not mean every clutch is winnable. Use the round to learn a repeatable decision, and avoid treating an unlikely highlight as the standard plan.
9. Practice one problem from the match you just played
Use a short warm-up for stop-and-shoot timing, controlled bursts, and the weapon you will actually buy. Then spend a few minutes rehearsing one route and its key grenade. Warm-up should prepare you to make decisions, not exhaust your attention before the match.
Afterward, review three useful rounds from a demo or recording: one early death, one lost advantage, and one failed objective attempt. Pause before contact. Was your crosshair ready? Could someone trade? Did your utility remove a threat? Had the team already lost the round through time or economy?
Write one actionable correction: “hold the second angle instead of copying the entry,” “leave enough money for the next full buy,” or “do not reload immediately after the first kill.” Practice it in the next session. Improvements that survive pressure are worth more than a long list of tricks you never recognize a chance to use.
Frequently asked questions
Should a new player buy the AWP whenever they can afford it?
Not automatically. The AWP requires an appropriate position, supporting equipment, and a role in the team’s plan. Learn rifle fundamentals and the economy first. If an expensive sniper purchase leaves you unable to contribute to the next several rounds, affordability alone was not enough justification.
Why do I lose duels after practicing aim?
Check movement accuracy, the initial crosshair position, and how many angles you exposed. Aim practice usually removes those complications. A duel against two possible positions while still strafing tests more than your ability to put a crosshair on a target.
Do I need dozens of smoke lineups?
No. Learn a small set that helps a concrete plan on maps you play. Know the required position, aim point, release, timing, and purpose. Recheck after map changes. A well-timed basic smoke with teammates ready often contributes more than an elaborate throw nobody follows.
What should I say when I die?
Give the confirmed location, number of opponents actually seen, and useful damage information if you have it. Avoid presenting footsteps or assumptions as certainty. Then leave enough silence for the remaining players to hear and act.
Sources & version notes
Use these references alongside the guide to check changing rules, availability, and update details. Community-maintained references are identified below. Strategy examples above are Snowyme's editorial guidance.
- Counter-Strike 2 official site ↗
Valve’s overview of CS2, including its smoke and technical systems.
- Counter-Strike official updates ↗
Check Valve’s update notes for current maps, weapon adjustments, and rule changes.
An independent guide by Snowyme. Not affiliated with or endorsed by the game's publisher. Cover artwork is an original strategy illustration, not an in-game screenshot.